Postpartum Freezer Meal Prep: Twice-Baked Potatoes

In a fit of nesting, I decided to start scheduling a weekly cooking session dedicated to stocking the freezer with healthy-ish meals to keep us nourished in the few weeks following the arrival of Baby 2. (Informally, my first freezer meal was breakfast — that is, Moose Muffins.)

This week, I prepped some healthy-ish twice-baked potatoes. I love twice-baked potatoes, because they’re quick and easy to make, versatile, universally yummy and they freeze well. They’re also easy to eat: I confess to eating them one-handed like a taco in the days following Baby 1’s birth.

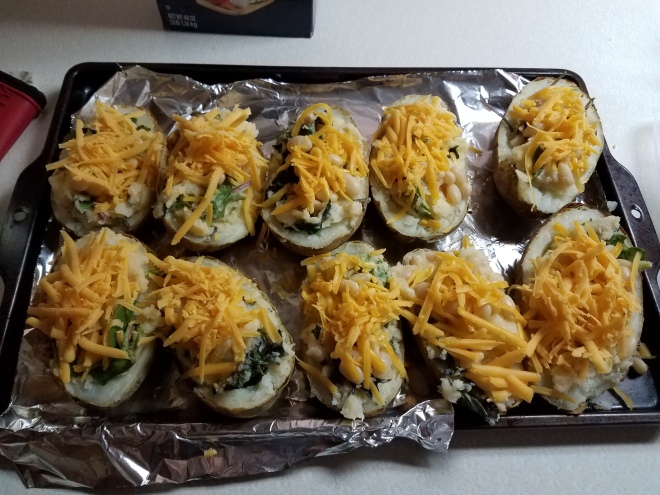
This time around, I stuffed them with mixed baby greens, white beans and cheddar cheese.

Hollowed baked potatoes
Baked potatoes, then allowed them to cool enough to handle. Halved and used a tablespoon to scoop out the innards into a bowl.
Mashed potatoes with beans
After mashing the potatoes, I mixed in shredded cheddar cheese and navy beans.
Mixed greens and potatoes
Mixed in some baby mixed greens.
Twice-baked potatoes
Refilled the potato shells with the mixture
Twice-baked potatoes
Added some more beans on top.
Cheesy twice-baked potatoes
Topped with more cheese, of course!

Here’s a quick and easy recipe with recommendations for variations.

Freezer Friendly, Healthy-ish Twice-Baked Potatoes

  1. Bake potatoes (I think I did 425 degrees for an hour or so in the oven.)
  2. Allow them to cool for at least 15 minutes, or until you can handle them without injury. I do find the scooping and mashing goes a little easier when everything is still warm, though.
  3. Halve the potatoes. Use a tablespoon to carve out the insides, leaving a decently thick shell to hold up to the filling.
  4. Mash the scooped-out potatoes with salt to taste. Then mix in your choice of fillings (see below for some combos).
  5. Refill the shells with the potato mixture. Top as desired (again, see below!)
  6. If you want to eat them right away, pop them back in the oven until they are thoroughly reheated and the cheese topping is browned to your liking. For freezing, I like to freeze them first on the cookie sheet on which I assembled them (so the cheese sticks to the top) and then move them to their final storage container.
  7. To reheat from frozen, preheat the oven to 400 or so and bake them for 35 minutes, or until they’re heated through and the top is browned.

Twice Baked Potato Combinations

Beans and greens

Mix mashed potatoes with: cheddar cheese, cooked white beans and greens of your choice. (I mixed in whole, raw baby mixed greens because I think the second baking time will cook them just fine. Spinach also would be fine raw, as I think would Swiss chard, if you took out the stalks. Hardier greens, including chard stems, kale, or cabbage, should be sauteed or blanched first.) Top with: extra beans and cheddar cheese

Taco potatoes

Mix mashed potatoes with: Cooked ground turkey or beef with your preferred taco seasoning, diced pickled jalapenos, shredded Mexican cheese or queso fresco.  If you’re not worried about them looking a little pink, mix in a little of your favorite salsa, too. Top with: Crumbled queso fresco/shredded Mexican cheese, extra meat, black olives. (Plan to serve with diced avocado and/or fresh salsa.)

Bacon Broccoli

Mix mashed potatoes with: Chopped, steamed broccoli, shredded cheddar cheese (I’d do sharp white cheddar for this one), and sauteed onions. Top with: Crumbled bacon and more cheddar.

Chicken Tikka Masala

Mix mashed potatoes with: Shredded cooked chicken, jarred tikka masala sauce, cilantro, and maybe some chopped, roasted vegetables of your choice or even chick peas. Top with: Probably nothing? I can’t think of a cheese that would go well on top, but you could garnish with some fresh cilantro after you cook them. All credit goes to my friend Marissa, who recently recommended Indian food with mashed potatoes instead of rice. Not something I would have thought of on my own, but DELISH!

All right, readers… let’s crowd source. Any other combos you’d try for twice baked potatoes? Let me know in the comments!


Postpartum Freezer Meal Prep: Twice-Baked Potatoes

Cooking with Toddlers: Moose Muffins

We recently checked out from the library If You Give a Moose a Muffin, and The Toddler loves reading it (along with the OG If You Give a Mouse a Cookie.) While I haven’t posted a recipe here in about 100 years, we just succeeded in a small baking experiment that works for killing some time, delighting a toddler, connecting literature to real life and prepping breakfast for the week, all in one.

Moose Muffins - inspired by the children's book
Moose muffins! Very little added sugar, no added oil, contains both fruit and vegetables, and best served with a good book 🙂

If you’re anything like me, it also provides your young baker a lesson in flouting the specific measurements of any given baking recipe and enjoying or suffering the consequences. (Fortunately, this turned out pretty good!) I’ve never been one to closely follow a recipe, so consider this a basic roadmap from which you can detour depending on what’s in your pantry and what your family likes to eat.

The Toddler gobbled a few mini-muffins up as soon as they were cool enough to eat, and seemed pretty impressed that his pouring and mixing turned into food. He even helped clean up afterward!

I kept these pretty low-sugar so I wouldn’t feel guilty about serving them for breakfast and didn’t add any oil (though I use whole milk/yogurt in my muffin recipes and entire eggs.) I do find that the no-oil muffins I make tend to stick to the muffin cups/tins more than usual, so don’t be afraid to be a little liberal when greasing them.

Finally, thanks to The Husband for being a second set of hands during this activity; it’s doable with just one adult, but a nice weekend-morning family activity. (If you’re doing this solo, try to gather everything up before your little one is waiting anxiously to get started or you may run out of attention span.)

Moose Muffins - baking with toddlers (The Last Mommy Blog)


Moose Muffins

Makes 12 regular muffins and 12 mini muffins

Dry ingredients

  • 1 1/2 cups whole wheat flour
  • 1 1/2 cups old fashioned rolled oats
  • 1/4 cup – 1/2 cup ground flaxseed
  • 1 1/2 teaspoons baking soda
  • 1 1/2 teaspoons baking powder
  • 2 teaspoons cinnamon
  • 1 teaspoon allspice
  • pinch of salt

Wet ingredients

  • 1 1/2 cups unsweetened applesauce
  • 1 cup shredded zucchini
  • 3/4 cup whole milk
  • 3 heaping tablespoons of raw sugar
  • 1 teaspoon vanilla
  • 2 eggs
  • 1/4 cup to 1/2 cup of raisins (we used golden raisins)

Directions

  1. Read If You Give a Moose a Muffin with your toddler. Ask, “Would you like to bake some muffins for a moose?!” If they respond enthusiastically, “Yes!!!!” proceed. If not, try again some other time.
  2. Preheat the oven to 350 F.
  3. Strap your toddler in to a booster seat/high chair at the kitchen table so they can’t run amok with ingredients, and then pile everything up just out of their reach. Gather a wet ingredients bowl, dry ingredients bowl, a teaspoon, your measuring cups, muffin tins and muffin liners.
  4. Have your toddler line your muffin tins. (We don’t have mini muffin liners, so I swiped at the mini muffin tin with an oil-soaked paper towel.) See note above about these being sticky; feel free to grease the muffin liners themselves to avoid this.
  5. Put the dry bowl in front of the toddler and measure out each ingredient for him and let him dump the measuring cups into the bowl and stir in between. To make it even more educational, do lots of counting: “This is one cup of flour.” “We need two scoops of baking soda.”
  6. Do the same with the wet ingredients, cracking each egg into the measuring cup and letting him dump, etc.
  7. Mix the dry ingredients into the wet (or is it vice versa?Whatever muffin recipes usually say.) Try not to over-mix. Fold the raisins in last.
  8. You should probably do the scooping of the muffin batter into the papers/tins, but count while you do it.
  9. Bake muffins. The mini muffins were done in about 12 minutes, and the standard-sized in about 20-22 minutes, but your mileage may vary.
  10. Allow to cool, serve with blackberry jam! (Consume while re-reading If You Give a Moose a Muffin.)

Substitutions and variations:

  • Finely chopped walnuts would be really good in this (if your kid is of the age to eat such things.)
  • Swap out some or all of the applesauce for pumpkin puree; switch the shredded zucchini for shredded carrot. (I’d also probably switch to regular black raisins for this alternative.)
  • Don’t like raisins? Use frozen blueberries! Or chocolate chips! Or nothing!
  • Don’t have zucchini? Shred a fresh apple instead to make these extra-appley. I’d swap out the allspice for ground ginger in this case.
  • If we had any plain yogurt in the house while I was making these, I would have used that instead of milk.
Cooking with Toddlers: Moose Muffins

Things my toddler won’t eat

I was a picky eater growing up, and the list of things I didn’t like included tomatoes, peppers, cheese (yes, seriously), olives, anything remotely spicy, most fish, onions, and a myriad of other things. Combine this with my on-again, off-again status as a vegetarian, and my diet was pretty much peanut butter and jelly sandwiches.

When I was around 21 or so, I decided being finicky was an obnoxious personality trait and made it my mission to acclimate myself to a wider variety of food.

I realize calling pickiness an obnoxious personality trait is kind of mean, and everyone has the right to eat (or not eat) what they want. Sure, there are still foods I prefer over others, and some things I will never love no matter how much I try (looking at you, green bell peppers).

But If everyone can complain about sanctimonious vegans or millenials’ love of avocado toast, I can tell you to shut up about not eating mushrooms. If you don’t like something, just quietly don’t eat it. As they say, “Don’t yuck my yum.

I’m digressing pretty stupendously, though. My point is that I hoped to raise an adventurous eater when I had Baby 1. We did the whole Baby Led Weaning thing, and I’ve made it a point to never say, “Yuck” to anything that wasn’t, for example, a ball of lint or a dead bug heading toward his mouth. When everything is new to him, there’s no reason to prime him to expect certain foods to be superior or suspect.

Being nonchalant about what he eats means that he’ll generally try new things voluntarily, but as the toddler years have crept forward, he’s become far more selective in his food choices. I suppose it’s inevitable.

Things my toddler won't eat

Here’s a short list of things my 21-month-old won’t eat right now:

  1. Anything sandwiched. Quesadillas, peanut butter and jelly, grilled cheese, a sub. Bread? Delicious. Cheese? Can’t get enough. Jelly? He’d gladly lick it off the rug if the opportunity arose. Put any of these items together in a stack and he’ll either dismantle it and eat just the insides, or stare at me like I’ve put a kitchen sponge on his plate and suggested he might eat it. This also counts for toast with a topping (usually), and pizza.
  2. A mandarin orange if I’ve broken it into segments. Or other times, a mandarin orange if I haven’t broken it into segments. It’s impossible to predict which one he wants, even if you ask.
  3. Similarly, apple slices. If I cut an apple up out of his sight, he’ll probably eat the slices, but if he sees the whole apple, it’s game over. It doesn’t matter if it’s the size of a softball, he wants the whole thing. Nevermind that he’s done with it in two bites and leaves it to slowly decompose under the couch while I’m not looking.
  4. Shrimp. He called it “egg” when I tried to serve it to him at dinner the other night. He loves eggs, but wouldn’t eat the shrimp. Whatever, I get it. It’s a little weird. I’ll keep trying.
  5. Cereal with milk. He’ll ask for it over and over again. He’ll pry my cereal bowl out of my hands so he can drink the sweetened milk. But if I serve him a bowl of his own cereal with milk, it inevitably becomes chicken food. (Parenting tip: If you have a picky toddler and hate seeing food go to waste, get some chickens. They eat pretty much everything.)
  6. Sliced tomatoes. He’ll eat halved cherry tomatoes until he explodes, but if they’re any larger, they’re apparently poison.
  7. Cheddar cheese sticks. He eats about 15 mozzarella cheese sticks every day, but come at him with an orange one and he’ll fight you. Similarly, I had to buy muenster cheese slices because they were out of provolone cheese at the grocery store when I went this week, and I’ve had to start cutting them into circles with a rocks glass because he will only eat “circle cheese.”
  8. Rice. I can’t fathom how this is unpalatable to him, but it is. At least this week.
  9. Pineapple and melon. Those cheap mixed fruit bowls they serve at restaurants, with the melons, pineapple, and grapes? They’re just a scavenger hunt for grapes with gross filler, I guess.
  10. Leaves of any sort. I doubt this is an unusual toddler food aversion, but he won’t touch lettuce/salad, or cooked greens. He’ll also pick around them if I put them in a frittata, and refuses to eat pasta with spinach pesto. He will annihilate a smoothie, though, so that’s how I tend to sneak in any leafy greens.

None of this is helped by the fact I barely have energy to plan meals lately. Oh well, he’ll survive off cottage cheese, hardboiled eggs, broccoli and blueberries for the foreseeable future. That, and the half-eaten apples he has strategically stashed around the house.


Things my toddler won’t eat

Farm Life Interlude: And then there were five

Remember for a chunk of time how this became barely a parenting blog and more a blog about very tame backyard farming? If not, here are a few samplings from that time:

Well, because I generally have the brain power for just one post a week, and because I’m pregnant again and therefore have a pretty easy framework for new material, I have neglected to talk much about our little menagerie for awhile. But I wanted to take a moment to memorialize a sad milestone in our farming adventure.

Last week, on a dark and stormy night, we lost a chicken.

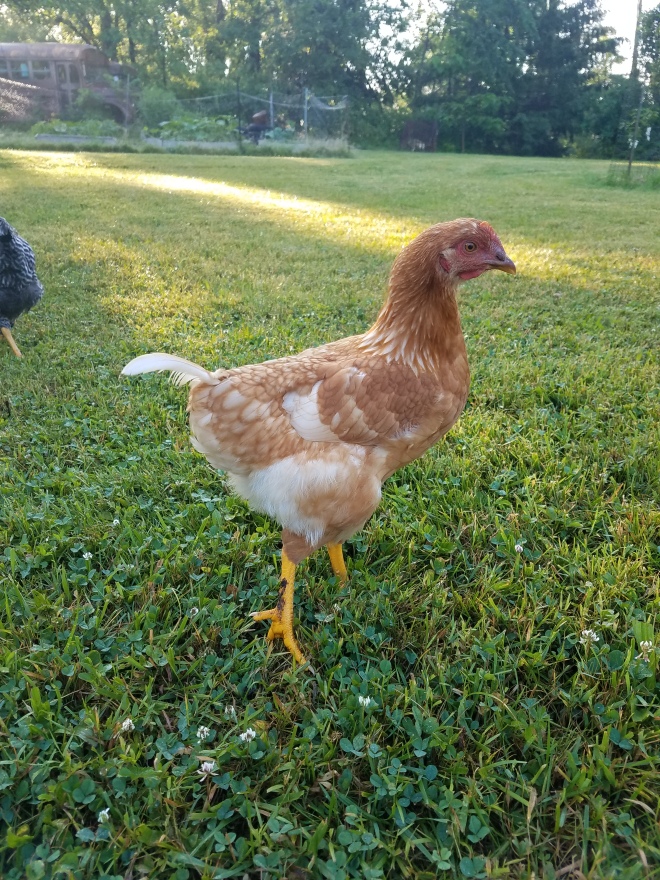
Hera was a good chicken. She was about 17 weeks old, the only Buff Orpington in our little half-dozen flock. She was timid and sweet, she didn’t like to be pet but would eat out of my hand. She was getting big and nearing the time she’d start laying eggs. She had recently lost a bunch of tail feathers, making her look (to me, at least) the most dinosaur-like of all our chickens whenever she broke into a run.

Hera
Rest in peace, chickie.

I promised him I wouldn’t invoke the wrath of the Internet when telling this story, and I hope not to because he doesn’t deserve it: The Husband took a break from working on his laptop last Monday to lock the chickens in their coop for the night. (They free range all day and put themselves to bed at about 8:30.) He went out to check on them before the storm rolled in — even counted them all because they dogpile in their nesting boxes instead of roosting and are sometimes hard to see (need to figure that one out…) and then, unfortunately, went inside without remembering to close and latch the door to the chicken run.

In the night, something (fox? raccoon? coyote?) crept in and snatched up Hera. Whatever it was left behind a trail of bloody feathers and a rattled remaining flock. I think the thrashing, hours-long storm that struck was a stroke of luck because it probably kept away any later predators who would have taken advantage of the situation.

The Husband was beside himself with regret the next morning when I went to let the chickens out and found all but one emerging from under our porch. I felt sadder than I expected to, but not angry. For as absent-minded as I’ve been lately, it could have just as easily been me who forgot to latch the run.

Or, it could have been if I were ever awake late enough for it to be my job. The Husband has picked up so much slack since the pregnancy fatigue sunk in, including night chores for the animals, I feel bad that the responsibility has fallen almost solely on him.

Today, while walking around our pond with The Toddler before bedtime, I heard our dog crunch something (unusual, as she’s not a stick chewer) and found she had unearthed a chicken thigh bone with a few orange feathers stuck to it. Hera’s remains.

I can’t count how many chicken thigh bones I’ve discarded over the years without a second thought, but I picked up this one and brought it back to the porch.

Maybe it’s silly to bury a chicken, but that’s what we’re going to do.

She was a good egg.


Farm Life Interlude: And then there were five

Pear overload

Happy Labor Day weekend, everyone! Happy 28th birthday to my little brother (and to my mom, and to all the other mothers who are or have taken the name of this holiday quite literally to mean welcoming new babies to the world.)

This weekend we did a whole lot of cutting up fallen trees and felling damaged trees from the crazy storm that swept through our property. One very sad casualty was the 100-year-old apple tree right off our back porch that was crushed by a rogue locust tree the guys cut down. Their guide rope snapped and the tree ended up just brushing our gutter, but annihilated the apple tree. It was on its last legs, propped up with an old post, but we were hoping to keep it alive another season to try to graft it. It had been planted by my great grandfather.

Anyway, as it’s not particularly safe to operate a chainsaw with a baby on your back, my contribution to the storm cleanup this week was trying to preserve the windfall of pears that had been blown from our trees in the storm. They were slightly underripe when I picked them up off the ground, but at the same time almost universally bruised or cracked from their fall, so it was a race against the clock to get them processed.

I took zero photos and have no recipes to share with  you. The Baby has been napping for two hours (!!!) and is due to wake up any second, so here’s just a short list of things I made with the pears:

  • Pear sauce! Just like applesauce, but with pears. Organic and with no sugar added, this makes a great baby food. And the cooking helps soften and sweeten the harder, greener, most underripe pears. I froze a little under two gallons of it and with the other gallon or so I made…
  • Pear sauce bread. I adapted this recipe  based on what was in my pantry, using only whole wheat flour, not bothering to grind the oats, using plain full-fat organic yogurt rather than sweetened Greek yogurt, and using pear sauce that still had pretty big chunks of not-too-mushy pears in it. I also didn’t add in any extra fat (coconut oil or butter) since the yogurt was full-fat. I just adjusted the amount of yogurt so that the batter was the appropriate texture/wetness. It turned out pretty good, like really dense bran muffins but moist because of the pears. We’ve eaten two loaves and there are two in the freezer.
  • Pear pie with a bacon-grease crust and oat crumble topping. (This I made with the riper pears without pre-cooking them.) I’ve been straining and refrigerating our bacon grease for awhile now, and while I’ve done some vegetable sauteeing with it, I needed to use it up and have been considering it for pie crust for awhile. I did a little Googling and ended up just sort of eyeballing the flour-to-bacon-fat ratio with a tiny bit of ice water. It didn’t roll out great, but it ended up with a surprisingly nice texture. It definitely had a hint of bacon flavor, but with the pear filling, it was good! I adapted this recipe for the pie filling/topping.

All in all, I was able to save about 10 pears that were undamaged and could ripen and be eaten raw.

So that’s been my weekend. I find myself getting a little overwhelmed during harvest season, not wanting anything to go to waste but also not wanting to spend all waking hours blanching tomatoes and making pepper jelly (another thing I did this weekend), but it does make winters nicer to have access to this stuff, and it sure helps our budget while we’re living on one income, plus whatever I can earn freelancing.

I’ve got a little pear sauce left. Anything else I should try to make with it?

20160828_183257
The pears – after the storm, before I cooked them. (Or, in most cases, before the deer ate them.)
Pear overload

A Sunday Storm, and a jagged horizon

This weekend was nice, as we neglected our endless to-do list a bit and I hosted a meeting of the craft club I started almost two years ago now (more on that…someday. I was hoping to do a comprehensive post with charming pictures to go along with it, but The Baby was too rowdy for me to take pictures. I’ll get to it eventually.)

Anyway, yesterday evening, The Husband, The Baby, my parents, brother and I were sitting around our kitchen table eating dinner as we have been doing together on Sundays since we moved out here. The sky had been threatening (welcome) rain for an hour or so, and suddenly it started to rain hard.

Our house is almost all windows, and my parents were marveling at how hard it was raining. I, a hardened cynic when it comes to bad weather (probably a knee-jerk reaction to my mother’s insistent demands for us to go to the basement all the time in childhood lest we be swept up into tornadoes–how we scoff at our parents’ desires to keep us safe!), kept eating with nonchalant, “Uh huh, I see it”s.

It was getting dark though. The wind was picking up. The hard pelting rain turned into hard pelting hail. The world turned white outside from the sideways spray of precipitation. All at once, everyone at the table but me and The Baby rose from their seats and decided we had all better skedaddle into the basement, for real. (Looking up from my food, I quickly unbuckled The Baby from his high chair and followed suit. The Baby brought his corn on the cob with him.)

As the first of us hit the top of the stairs, the power went out. We watched from the basement window as the storm left just as quickly as it had come. When it seemed safe, we went back upstairs to assess the damage.

We’re really, really lucky, but this is also the worst storm we’ve ever had on the property, going back as far as my dad can remember.

There wasn’t a tornado, but sudden strong winds whipped the tops off big, leafy trees. It toppled several of the dozens of dead ash trees (ash borers, frown). In the woods around my parents’ house, several old growth trees that my dad had spared from loggers were uprooted, leaving gaping cavities in the dirt the size of small craters.

Last night The Husband helped my brother and dad clear the half-dozen trees that had fallen from our property across our neighbors’ driveway. Both of our driveways had been blocked too, ours by a big thorny locust tree.

It also knocked every last near-ripe pear off the two pear trees near our barn. I strapped The Baby to my back, grabbed a five gallon bucket and salvaged what I could, but most of the pears had hit the ground so hard they were practically shattered.

We are really lucky–power returned at around midnight last night (so my heroic act of eating all the ice cream out of the freezer turned out to be unnecessary), and more importantly, nobody got hurt, and our house, my parents’ house and all our vehicles were unscathed.

The Husband called in from work today to help with the damage, and so did my brother. We took turns looking after The Baby and helping out outside. We spent all day clearing out the biggest branches around the house. I washed a bucket of pears and have cooked two batches of pear sauce with a lot more to go.

This is a big setback. We already have so much to do to try to restore this property to its former well-kept state (not to mention kicking off any of the half-dozen or so pipe dreams we’ve got cooking). And while it is a great relief to have come through the storm unharmed, I feel something a little like grief seeing great old trees broken, jagged and felled in every direction I look.

Here are some pictures of the damage, including one of me looking like straight up garbage. You’ll notice I’m suffering from “South Carolina eye,” allergy eyes that haven’t plagued me since moving back up from the pollen capital of the world. I also have twisted my stretched out maternity tank top into the straps of my ill-fitting nursing bra and am wearing a bandana over my inexcusable hair-ball (calling it a mom bun would be generous to the point of absurdity) — I had to wear The Baby on my back to pick up pears and he’s figured out how to rip out handfuls of hair if I don’t wear something to block him. Anyway, I’m sharing this photo with you, Internet moms, in the spirit of openness, and knowing you’re not going to judge me. Don’t let me down.


A Sunday Storm, and a jagged horizon

Feeding and care of new moms

Weeknight meal wednesday.jpg
I know. It’s Thursday. Don’t care.

As soon as The Baby wakes up from his morning naps (which, I hate to admit, he’s been sleeping through far better since my recent acquisition of yet another Amazon Prime impulse buy. He definitely likes to have his arms up by his face but can’t sleep when he can fully flail. Thank you, Amazon gods. Take all my money and all my hypocritical proclamations about anti-consumerism. P.S. Thank you also, Amazon gods, for the gift of a baby jail. The Baby hasn’t chewed on any electrical cords since its delivery!)

I cannot get through one sentence without a major digression.

Anyway, as soon as The Baby wakes up, he and I are headed to Cleveland to bring food and fun to my good friend and fellow new mom, who celebrated the recent Cavs championship win by going into labor.

Having recently been well fed and cared for by my friends in my own early weeks postpartum, I thought I’d share a delicious, easy meal that is one of my faves and travels/keeps well. It’s not Wednesday, I know, but I made this last night, so it’s still a Weeknight Meal Wednesday.

I adapted this recipe from Pinch of Yum the first time I made it, and it has become one of my staple recipes. Its many, many iterations are all over Pinterest, so it’s not exactly a novel idea but I FREAKING LOVE IT. It’s extremely adaptable, super healthy and easy enough to make even if you have a six month old.

Butternut Squash Shells & Cheese with Chicken and Tatsoi

This recipe made two 9″x 9″ casseroles worth of dinner (one for my family and one to give.) Halve just about everything if you’re less hungry (though you can always freeze half!)

Ingredients

  • One large butternut squash
  • One large/two medium onions
  • 2 lbs of short cut pasta (I used shells)
  • 3 chicken breasts
  • 1 big bunch of tatsoi (this came in my Fresh Fork bag last week. You could also use kale, swiss chard, broccoli or another green of your choice. This was delicious!)
  • Milk (maybe 2 cups? Did not measure)
  • 1 block of meltable cheese (I used Monterey Jack), shredded
  • A dollop of spicy brown mustard
  • Dried thyme
  • Garlic powder
  • Kosher salt & black pepper to taste
  • Butter/canola oil

Directions

Cut your squash and roast it. I think I did 350 for about 45 minutes, with the squash cut into disks. I also have success cutting the squash in half vertically, sticking each half face down in a baking dish with a little water underneath for steam, and cooking, but I wanted a little roasty flavor on thse because that one circle ended up being a snack for The Baby.

I also took this time to cook three chicken breasts, seasoned with salt, pepper and thyme. Once they’re cool, you can chop them up into bite-size pieces and set them aside/stick them in the refrigerator until you’re ready to put everything in the oven.


While the squash is cooking, now is a good time to shred your whole block of cheese. This can be done a little in advance because you need to be able to handle the squash, so allow it to cool a bit. Some recipes tell you to peel & cut up the raw squash and steam/cook it on the stovetop, but I’m not about to spend time peeling a raw butternut squash. Moving on.

Chop up your onions (slices are fine because you’re going to end up pureeing the whole thing) and sweat them out in some butter, thyme and kosher salt. (I sadly used all my butter to make an upsettingly decadant cookie dough snack while I cooked lactation cookies, so I had to use oil. Butter is better if you’ve got it.)

Get your pasta water on to boil. You will want your pasta to be piping hot and ready to go when the sauce is done to help incorporate the cheese. Undercook it just a little so it doesn’t get too soft in the oven later.

Once the onions are very sweaty/leaning toward caramelized, add the squash. Once everything is good and soft, it’s time to buzz it up with milk and a tablespoon or so of spicy brown mustard in your favorite food processor-type gadget. I use a Nutribullet, which isn’t quite big enough for the whole thing so I do it in two batches. The consistency and color will approximate the nasty fake cheese in a delicious boxed shells and cheese.

Drain the pasta, return it to the pot and add the squash puree. Begin to mix and stir in about half the shredded cheese. This is about the time I thought to cook up some greens to add, but any time before this step is good, too! I cooked the chopped stems in a little oil and then steamed the leaves, making sure they weren’t too water (but as the shells were a little under and everything goes in the oven, it’s not a big deal if there’s some extra moisture.) Add the chopped chicken and stir everything up. If it looks a little dry, add a few splashes of milk.

Grease two 9″x9″ (or 8″ x 8″? I dunno, square) *baking dishes. If you’re eating yours for dinner, preheat the oven back to 350. Split the pasta into the two baking dishes. Bake the one you’re eating now, covered in foil, for about 30 minutes. You can uncover for the last few minutes to brown the cheese, if you life. I like to write cooking instructions on the foil of the other one to make it super easy.

*I broke one of my cardinal rules of dropping off postpartum dishes, which is Thou Shalt Not Create More Dirty Dishes for a New Mom. I had a bunch of foil baking pans perfect for such occasions but lost them somewhere in the move, I guess. Don’t be like me.

Here’s the finished product! And a bonus photo of the lactation cookie dough I ate by the fist-full made to go along with it. I did not stray in any intentional or beneficial way from this recipe, so just go there and check it out. These are so, so delicious (and effective, in my experience.)


Baby’s awake, time to pack up the car… and meet his new friend!!

Feeding and care of new moms

Weeknight Meal Weds: Black Bean Burgers

Weeknight meal for new moms: black bean burgersFinally, the return of my extremely popular not-really-recipes food series for haggard new parents. I hope you all weren’t starving in the meantime!

Kind of a good-news/bad-news situation here.

The bad news: This is varsity-level effort for new parents. Something I’d recommend you work on during a Sunday afternoon while you have some extra help with the baby. (What can I say? I never thought the day would arrive, but it does start to get easier to cook when your baby can crawl under the couch entertain himself on the floor for awhile.)

The good news: Make a batch of these, pop them in the freezer and you can have several easy weeknight meals. The other good news: They’re super healthy and really tasty. The other other good news: This is a baby led weaning-friendly recipe.

The other bad news: This is a great example of what I refer to as “improv cooking” which means I didn’t measure anything and used leftovers in the recipe, so… good luck. Be creative. You’ll be fine. I adapted my recipe from the Pioneer Woman who clearly pays closer attention to her cooking than I do (and has stronger forearms and/or forks).

Black Bean Burgers (Good Enough for Baby)

Ingredients

  • About 1.5 cups of cooked black beans (If you’re feeding this to your baby, cook the beans yourself so you know there’s no added sodium, as babies can’t have salt and canned beans are super salty.)
  • 3-4 slices of bread (check the sodium content in your bread, too)
  • 1 egg
  • 1 small onion
  • About a half cup of leftover mashed potatoes (optional)
  • 1 small beet
  • Dried herbs of your choice – I used oregano and thyme
  • Chili powder
  • Garlic powder or chopped fresh garlic
  • Kosher salt (just for your portions)

If you’re eating the burgers tonight, you’ll also need

  • Washed baby spinach
  • Cheddar cheese
  • Hamburger buns
  • Mustard, ketchup, etc.

Instructions

Black beans

Drain your cooked black beans. Don’t rinse them. (If you’re using canned beans, remember this probably isn’t a good BLW meal, because of salt.)

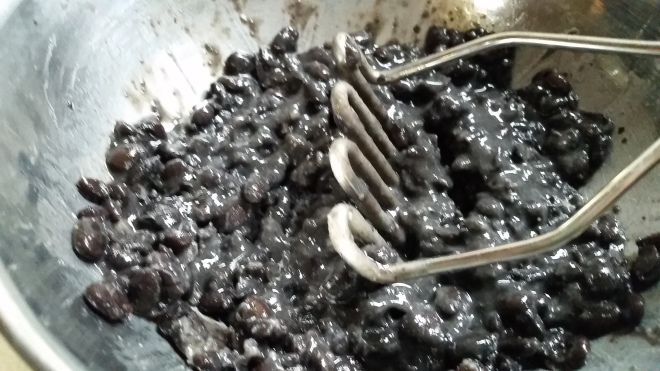
mash black beans

Mash them up in a bowl so they’re still chunky but smashed enough to stick together well. The Pioneer Woman used a fork but I guess my arms aren’t strong enough for that.

DIY breadcrumbs

Meanwhile, toast some bread. I used four pieces of whole wheat bread, but three of them were butts. Making your own bread crumbs is another good way to control salt, but if you can find low sodium breadcrumbs (and I’m leaving it entirely in your hands to do your BLW/sodium research), skip this step. (If you don’t like the state of my toaster oven, you should see my office hahahaha someone please come clean my house.)

breadcrumb grind

Let your toast cool off a few minutes so it doesn’t steam up, then grind it up in a food processor/bullet/etc.

black bean burger mix

Add to your black beans: The breadcrumbs, the herbs and garlic, a half teaspoon or so of chili powder (The Baby seems to like a little spice, but I didn’t go nuts on this recipe), the egg, a shredded small beet and a shredded small onion, and if you have it, some leftover mashed potatoes. (Mine had sauteed onion, zucchini and peas in it from some zucchini boats I made the night before. Salt reminder goes here.)

mixed black bean burger

Mix well and let sit for a bit. (The beets make it look like bloody red meat a little, don’t they?)

salt and blw

If you’re giving some to baby, pull out a portion to leave unsalted, then add kosher salt to yours.

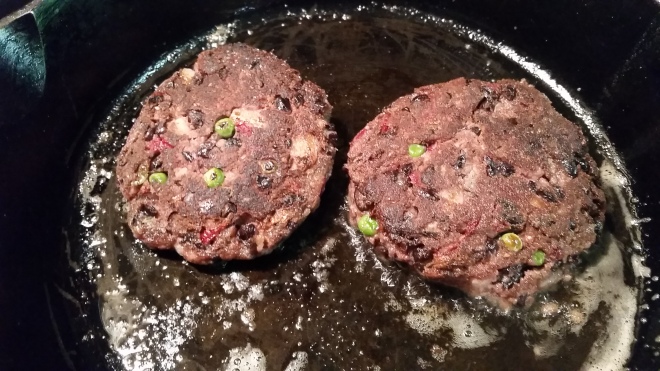
burgers sizzling

Heat a cast iron skillet and add a little canola oil (I also used some butter – aim for unsalted, said the broken record.) I’m getting used to a new stove (backdoor brag) so I got the pan a little too hot. Don’t be like me. Cook your burgers thoroughly on both sides. If you’re planning to freeze any, turn the heat down so they’re good and cooked but not super browned.

black bean burgers dressed

To serve, melt some cheese on your burger, then put it on a bun (or two pieces of bread if you’re improv cooking and don’t believe in grocery lists). Add mustard and baby spinach and enjoy.

baby's black bean burger

Here’s The Baby’s portion. The cheese helped hold it together a little, and because I was cautious about how much salt was in the burger itself (and he didn’t have anything else with salt in it that day) I didn’t feel nervous giving him any.

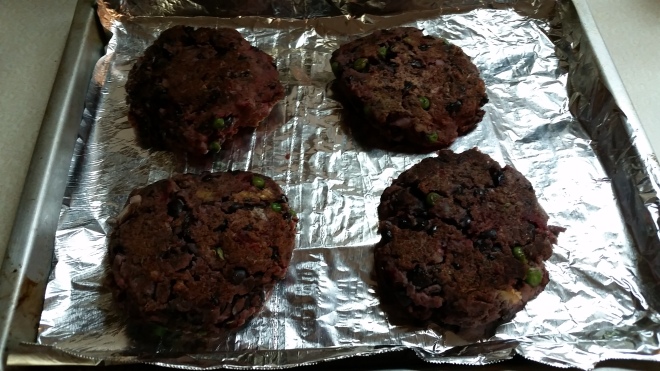
freeze black bean burgers

I froze the leftover portions first on a cookie sheet then wrapped them up and put them in a freezer bag. I’ll just turn the pan on nice and low and cook them from frozen the next time we eat them.

Bon apetit, my dear mamas. I know this is a more time-consuming recipe, so if you can’t pull it together, may I offer an alternative *recipe from my earlier days:

3 string cheeses, eaten on the couch while nursing. Three heaping tablespoons of frozen yogurt, eaten in front of the refrigerator. No more than two high fiber cereal bars, eaten in front of the computer while the baby naps. One very well-earned bottle of your favorite IPA.

*Not suitable for BLW.

support a blogger: if you liked this post, click to vote for me every time you visit.

Weeknight Meal Weds: Black Bean Burgers

Baby led weaning, indeed!

adventures in baby led weaningI hadn’t heard about Baby Led Weaning until I was pregnant and a friend asked if I planned to try it, but once I started reading about it, I was committed. It makes a lot of sense to me that babies should be given lots of variety, and the agency to decide what they want to eat and how much of it. As someone who was fed purees as a baby and grew into a kid who didn’t eat anything but peanut butter and jelly, mashed potatoes and chicken nuggets until basically college, I wanted to give The Baby every opportunity to start off on the right foot with food.

When I explained to my mom what BLW was, you’d have thought I was explaining how I was going to feed The Baby lit firecrackers and broken glass. When she was raising kids, purees were the only way to go because choking.  (As the BLW book explains, gagging ≠ choking, and babies gag easily and regularly as they figure out how to manipulate food in their mouths. As long as you’re supervising and not giving them nuts, whole grapes or other obvious choking hazards, they’re going to be fine.)

And while my mom still is adorably cautious about the whole ordeal (she peeled cherries for The Baby and then proceeded to cut them into pieces about the size of a small booger), I think at this point her delight in The Baby’s messy, exuberant dinners has diminished her fears about having to rescue him from a too-big piece of food.

This all started about a week ago. Although The Baby has been advancing pretty rapidly developmentally, sitting up with very little assistance needed, putting anything in sight in his mouth and gnawing on it with his gums, everything I’ve read has said not to start BLW until baby hits the six month mark, that any earlier than that is just too early for the baby’s digestive system and can up the risk for choking.

But I was holding a fussy The Baby at the dinner table during family dinner on Sunday, trying to finish up my corn on the cob so we could get him to bed, when he grabbed the other end of the corn cob and started chewing and sucking on it with the determination of a starving dog.

After that, The Husband and I tiptoed around the fact that this particular baby was leading us headlong into a new phase, trying to stick to the 6-month recommendation. The Husband would surreptitiously let the baby suck on the bitten side of a whole apple; I’d offer a chunk of banana in the mornings after TH left for work. Finally, unceremoniously, we gave in and started offering food on the regular. Each day The Baby has tried something new, and each day he has impressed us with his enthusiasm for whatever’s on the table (and his capacity for making a gigantic, gigantic mess.)

Here’s a short list of things The Baby has *eaten so far during his short but promising career:

  1. Corn on the cob
  2. Apple
  3. Banana
  4. Toast fingers with apple butter
  5. Cheddar cheese
  6. Mushrooms, beet greens and carrots out of a tomato-based soup
  7. Broccoli
  8. Penne pasta with broccoli and chicken
  9. Roasted potato
  10. Asparagus
  11. Roasted green beans
  12. An assortment of Indian food on naan
  13. Watermelon
  14. Peaches
  15. Frittata with spinach, onion and cheese
  16. Roasted sweet potato fingers
  17. Rice with sweet potato and chick peas mixed in
  18. Cucumber sticks
  19. A taste of mom & dad’s morning smoothies (usually beets, bananas, blueberries, spinach and almond milk)

So far, he hasn’t outright rejected anything, though the texture of cheddar cheese threw him a bit, and the tartness of some fruits makes him go a little walleyed. I’m really happy we opted to go this route and can’t wait to continue exploring new tastes and textures with my favorite little gourmand.

As a bonus, his eating our dinners has forced me to step back toward healthier meals from my exhausted and defeated approaches to dinner in the recent past. Someday soon I’ll revisit Weeknight Meal Wednesdays with a BLW-friendly meal.

Join the conversation: Did you go the BLW route? What were some of your baby’s favorite foods? Any tips for someone just starting off?

support a blogger: if you liked this post, click to vote for me every time you visit.

Baby led weaning, indeed!

Weeknight Meal Wednesday: Mom party food

Weeknight meal for new moms: Greek salad & pizzaI referenced in my post earlier this week a Greek-style salad and white pizza I made for my mom friends a few weeks ago.

I should say: My baby is getting older so my obstacles are shifting as I cook. When he was all about sleeping in a baby carrier all the live long day, I wouldn’t have been able to get a pizza in and out of the oven very successfully. So keep that in mind if it’s still early days.

But the great thing about this meal is it tastes great at room temperature, so you can make it a little ahead and your mom friends (or your significant other) can grab and eat as timing permits.

Greek Salad

This is an easy and very adaptable salad. A yogurt-based dressing or Bulgarian (soft) feta cheese make it creamy.

Ingredients

  • 1 English cucumber
  • 1 can chick peas
  • 1 small jar Kalamata olives (Be kind to yourself. Buy pitted!)
  • 1/2 medium red onion
  • 1-2 ripe tomatoes
  • 1 bunch fresh parsley
  • 1 small container *feta cheese
  • Baby spinach (optional)

For the dressing:

  • Extra virgin olive oil
  • Lemon juice (it’s OK to use bottled)
  • Brown/dijon mustard
  • Dried or fresh herbs, oregano is especially good
  • Salt & pepper
  • Plain yogurt (optional)

Instructions

Seed and chop the tomatoes and cucumber into bite-size pieces. Toss in a bowl with the rinsed can of chick peas. Check the olives for pits, chop coarsely. Chop the onions. (I don’t really like the bite of raw onions, even red onions, so I did a quick pickle: I chopped them into bite-size pieces and tossed them in a very small pot to which I had added white vinegar, salt and some pickling spices once it came up to a near boil. I let it sit for a few minutes before draining and rinsing. This is entirely optional, but I enjoyed it.) Chop and add the parsley. Finally, add the feta.

*My grocery store sells Bulgarian feta, which in addition to being way cheaper than the Greek version, is very soft and ends up lending a creaminess to the salad once I mix it in. If you don’t have this option, no worries.

Mix the dressing separately. I usually use a mason jar and shake the whole thing up. I do about 1 part lemon juice to 3 parts oil, add a good dollop (a teaspoon?) of mustard, a small handful (tablespoon?) of dried herbs that I first smashed up in my hand, and salt and pepper to taste. If you want a creamy dressing (and/or if you didn’t find Bulgarian feta), add some plain yogurt to the mix. Taste and adjust as necessary.

Because there’s no lettuce in the salad, it won’t wilt much. Toss it with the dressing and chill it for a little while before you serve to let the flavors meld. I ended up having a lot of liquid from the tomatoes & cucumber, so I mixed in some baby spinach leaves before serving to pick up some more of the dressing.

Greek salad
The salad, pre-dressing. Gorgeous, no?


White pizza

I used to make my own pizza dough usually. Then I had a baby.

Ingredients

  • 1 package of fresh pizza dough (I bought whole wheat)
  • Red onions (use the other half from the Greek salad recipe)
  • One tomato (a meaty tomato like Roma is probably best for this)
  • A few slices of bacon, cooked crisp and crumbled
  • Olive oil
  • A ball of fresh mozzarella cheese
  • A few cloves of garlic
  • Dried herbs of your choice

Instructions

Bring the pizza dough out of the refrigerator and let it sit on your counter to warm up for awhile so it’s easy to stretch. Once it’s pliable, stretch it out and lay it on a greased pizza pan (you can also spread cornmeal underneath it.)

Preheat the oven to pretty hot. Say, 450°?

Drizzle or brush olive oil onto the dough. Finely chop the garlic and spread it around. Add some dried herbs if you want; I went with dried oregano to match the dressing in the salad.

Slice the mozzarella cheese into disks as thin as you can get them without cutting yourself and cover the dough with them (you can leave gaps, it will spread.)

Thinly slice the onions and separate the circles. You won’t need a ton, just enough to spread out over the pizza.

Thinly slice the tomatoes and try to seed them well and get out as much moisture as possible. If you skip this step, you could have a very soggy mess on your hands, so take care.

Spread out your seeded tomato slices. Top the whole thing with bacon crumbles.

Bake until the crust is golden brown and the cheese is starting to brown. Slice and allow to cool a bit (you can eat it hot, but you’ll worry less about dropping crumbs on the baby if it’s at room temp!) Leave out some crushed red pepper flakes for people to season as they like.

Enjoy this easy white pizza with a Greek salad at your next new-mom get-together. Via The Last Mommy Blog.
The finished pizza. Yum!

Bon apetit, mamas!

Like this post? Like my blog? Do me a favor and let someone else know about it. Click those sharing buttons below.

Let’s connect! Find me on Twitter at @arkayokay.

Weeknight Meal Wednesday: Mom party food